Como tirar uma fotografia para documentos com o iPhone
A câmara traseira do iPhone oferece resolução mais do que suficiente para qualquer requisito atual de fotografia de passaporte, visto ou identificação. A dificuldade não está na câmara, mas na preparação: luz, distância, posição da cabeça e as definições de exportação corretas.
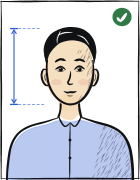
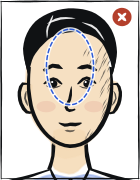
Resposta rápida
Câmara traseira, luz natural, tripé ou superfície estável
Abra a aplicação Câmara, mude para a câmara traseira e coloque-se a 1 a 2 metros de uma parede lisa, virado para uma janela. Use um tripé ou apoie o telemóvel sobre uma pilha de livros à altura dos olhos. Defina um temporizador de 3 segundos. Expressão neutra, sem óculos. Trate o resultado com a nossa ferramenta para recortar e redimensionar consoante o país de destino.
Passo a passo
Use a câmara traseira, não o modo selfie
Mude a aplicação Câmara do iPhone para a câmara traseira. A câmara frontal (selfie) usa uma objetiva grande angular que distorce as proporções do nariz, das orelhas e da cabeça — os scanners biométricos rejeitam essa distorção.
Coloque-se em frente a uma parede lisa
Escolha uma parede vazia cinzento-claro, branco-creme ou branco puro. Coloque-se a 1 a 2 metros dela para que a sua própria sombra não caia sobre a parede.
Vire-se para uma janela com luz natural
A luz natural direta de uma janela à sua frente dá o resultado mais limpo. Evite janelas atrás de si (rosto em silhueta), luzes de teto (sombras nas órbitas dos olhos) e o flash do telemóvel (sombras duras na parede).
Coloque o telemóvel à altura dos olhos
Use um tripé ou apoie o telemóvel sobre uma pilha de livros numa cadeira. A objetiva tem de estar exatamente à altura dos seus olhos — inclinar para cima ou para baixo distorce a relação queixo-topo da cabeça usada nas verificações biométricas.
Defina um temporizador de 3 segundos
Deslize para cima sobre o visor, ou toque na seta no topo da aplicação Câmara, para abrir os controlos adicionais. Toque no ícone do temporizador, escolha 3 segundos e prima o disparador. O temporizador permite-lhe descontrair o rosto antes da captura.
Desligue a Live Photo
Toque no ícone circular Live Photo no topo da aplicação Câmara até ficar riscado. Uma Live Photo guarda um clipe curto além da imagem fixa e, ao partilhá-la, o portal pode receber um fotograma diferente do que escolheu.
Mantenha uma expressão neutra de olhos abertos
Boca totalmente fechada (sem sorrir). Olhos abertos a olhar diretamente para a objetiva. Sobrancelhas descontraídas. Tire 3 a 5 fotografias e escolha a melhor.
Desative qualquer filtro ou embelezamento
Abra Definições → Câmara → Estilos fotográficos. No iPhone 13 a 15 escolha «Padrão»; no iPhone 16 e mais recentes toque em «Repor para padrão». Os Estilos fotográficos só existem a partir do iPhone 13 — em modelos mais antigos não há nada para desligar aqui. A suavização da pele e o realce dos olhos provocam a rejeição na maioria dos portais nacionais.
Mude o formato do ficheiro se o portal exigir JPEG
Definições → Câmara → Formatos → «Mais compatível» guarda as fotografias novas em JPEG em vez de HEIC. Não converte as fotografias já tiradas. Confirme primeiro o que o seu portal aceita: a renovação online do passaporte dos EUA aceita JPG, JPEG, PNG, HEIC e HEIF, enquanto muitos outros aceitam apenas JPEG.
Exporte e verifique antes de imprimir
Envie a fotografia para um computador via AirDrop ou e-mail para a verificar em resolução total. Depois carregue-a na nossa ferramenta — recorta consoante a especificação exata do país e exporta um JPEG compatível com os portais.
Perguntas frequentes
01Qual é o melhor modelo de iPhone para fotografias de passaporte?
Qualquer iPhone a partir do iPhone 8 tem resolução de câmara traseira mais do que suficiente. O iPhone 12 e modelos mais recentes oferecem uma gama dinâmica mais ampla, útil em luz mista. O modelo importa menos do que a preparação: um iPhone de cinco anos com boa luz natural supera o modelo mais recente sob luzes fluorescentes de teto.
02Posso usar o modo Retrato para uma fotografia de passaporte?
Não. O modo Retrato aplica um desfoque sintético ao fundo, que não passa na verificação de uniformidade do fundo da maioria dos portais nacionais. Use antes o modo Fotografia padrão.
03Porque é que a minha fotografia do iPhone parece diferente no ecrã do computador?
Os iPhone guardam as fotografias no formato HEIC por predefinição e aplicam um perfil de cor amplo que se imprime de forma diferente no papel fotográfico. Se o HEIC é aceite depende do portal: a renovação online do passaporte dos EUA aceita JPG, JPEG, PNG, HEIC e HEIF, enquanto muitos outros aceitam apenas JPEG. Exporte em JPEG através da nossa ferramenta para uniformizar formato e cor.
Guias relacionados
Transforme essa foto do iPhone numa fotografia conforme
Envie o ficheiro HEIC ou JPEG diretamente do seu iPhone — o Anfas.Pro converte-o, recorta-o segundo a especificação exata do país e verifica o resultado antes de enviar.