How to take a passport photo with an iPhone
The iPhone rear camera produces a high enough resolution for every modern passport, visa and ID photo specification. The hard part is not the camera — it is the setup: lighting, distance, head position and the right export settings.
In this article · 4 sections
Quick answer
Use rear camera, daylight, tripod or stable surface
Open the Camera app, switch to the rear camera, stand 1-2 metres from a plain wall facing a window. Use a tripod or rest the phone on a stack of books at eye level. Set a 3-second timer. Neutral expression, no glasses. Process the result through our tool to crop and resize for the target country.
Step-by-step
Use the rear camera, not selfie mode
Switch the iPhone Camera app to the rear-facing camera. The front (selfie) camera uses a wide-angle lens that distorts nose, ear and head proportions — biometric scanners reject this distortion.
Stand in front of a plain wall
Choose a blank wall in light grey, off-white or plain white. Stand 1-2 metres in front of it so your own shadow does not fall onto the wall behind you.
Face a window during daylight
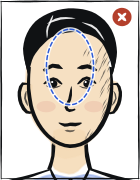
Direct daylight from a window in front of you produces the cleanest result. Avoid windows behind you (silhouettes the face), ceiling lights (eye-socket shadows) and phone flash (creates hard shadows on the wall).
Put the phone at eye level
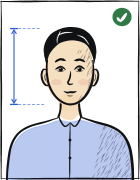
Use a tripod or rest the phone on a stack of books on a chair. The lens must be exactly at your eye height — angled up or down distorts the chin-to-crown ratio used in biometric checks.
Set a 3-second timer
Swipe up on the viewfinder, or tap the arrow at the top of the Camera app, to open the extra controls. Tap the timer icon and choose 3 seconds, then press the shutter. The timer lets you relax your face before the shot fires.
Turn Live Photo off
Tap the circular Live Photo icon at the top of the Camera app so it is crossed out. A Live Photo saves a short clip alongside the still, and sharing it can hand the portal a different frame than the one you picked.
Hold neutral expression with eyes open
Mouth fully closed (no smile). Eyes open and looking directly into the lens. Eyebrows relaxed. Take 3-5 frames and pick the best.
Disable any beautification or filter
Open Settings → Camera → Photographic Styles. On iPhone 13 to 15 choose Standard; on iPhone 16 and newer tap Reset to Standard. Photographic Styles exist only from iPhone 13 onwards — on older models there is nothing to switch off here. Skin smoothing and eye enhancement cause rejection on most national portals.
Switch the file format if the portal needs JPEG
Settings → Camera → Formats → Most Compatible saves new photos as JPEG instead of HEIC. It does not convert photos you already took. Check what your portal accepts first — the USA online passport renewal takes JPG, JPEG, PNG, HEIC and HEIF, while many others take JPEG only.
Export and check before printing
AirDrop or email the photo to a computer to check it at full resolution. Then upload through our tool — it crops to the exact country specification and exports a portal-friendly JPEG.
Frequently asked questions
01Which iPhone model is best for passport photos?
Any iPhone from iPhone 8 onwards has more than enough rear-camera resolution. iPhone 12 and later include a wider dynamic range that helps in mixed lighting. The model matters less than the setup — a 5-year-old iPhone with good daylight beats the latest model with overhead fluorescents.
02Can I use Portrait Mode for a passport photo?
No. Portrait Mode applies a synthetic blur to the background, which fails most national portal background-uniformity checks. Use the standard Photo mode instead.
03Why does my iPhone photo look different on the computer screen?
iPhones save photos in HEIC format by default and apply a wide colour profile that prints differently on photo paper. Whether HEIC is accepted depends on the portal: the USA online passport renewal takes JPG, JPEG, PNG, HEIC and HEIF, while plenty of others take JPEG only. Export as JPEG through our tool to standardise both the format and the colour.
Related guides
Turn that iPhone shot into a compliant photo
Upload the HEIC or JPEG straight from your iPhone — Anfas.Pro converts it, crops it to the exact country spec and checks the result before you submit.