Philippines passport photo rejected — DFA reasons and how to fix each
The Philippines runs its passport process differently from most countries: the Department of Foreign Affairs (DFA) photographs each applicant digitally during the appointment, so there is no photo to prepare in advance. Overseas Philippine posts capture the photo on-site as well. That makes this a guide to being turned away at the counter rather than to preparing a print — and the things that get people sent home are what they wore, what they left on, and what they assumed about the backdrop.
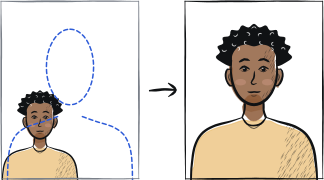
Fast diagnosis
Key checks: glasses and earrings left on, hair over the eyebrows, wrong assumption about the backdrop
Because the photo is captured at the counter, the rejection causes are things you can still fix in the queue: eyeglasses or shades, which official post guidance lists among the reasons a captured photo is rejected; earrings, eyelash extensions and heavy make-up, which the guidelines name directly; and hair covering the eyebrows. The one thing to settle before you travel is the backdrop — the DFA guidelines describe it as light blue and ask your clothing to contrast with it, so a printed photo belongs to separate consular transactions rather than to the passport itself.
7 common rejection checks
Ordering studio prints for a photo that is captured at the counter
For a passport application, the DFA photographs each applicant digitally during the appointment itself — inside the Philippines and at overseas posts alike. A printed photo belongs to separate consular transactions, not to the passport.
Glasses worn, of any tint
Official post guidance lists the use of eyeglasses or shades among the reasons a captured photo is rejected. Plan to take them off at the counter; contact lenses that change your natural eye colour are treated the same way.
Earrings, heavy make-up or hair covering the eyebrows
The guidelines ask for both ears and both eyebrows to be visible with no bangs, and name theatrical make-up, eyelash extensions and earrings among the things not worn during capture. Small studs are described elsewhere as acceptable if they do not obscure the face or cast a shadow, so the safe move is to take earrings off before your turn.
Head covering that is patterned, loose or the wrong colour
Coverings that cannot be removed for religious, medical or cultural reasons are allowed as long as the face is clearly visible. They must be form-fitting and a plain, uniform colour that contrasts with the light blue backdrop; patterned coverings, or ones with visible perforations between hair lines such as the taqiyah, are not accepted. With a covering on, ears may or may not be visible.
Wrong assumption about the background colour
Philippine passport photos are captured on-site, and the DFA photo-capturing guidelines describe the backdrop as light blue: applicants are told their clothing and any head covering must visibly contrast with it. Do not order white-background prints on the assumption that white is now standard.
Expression too different from a neutral pose
A closed-mouth smile is tolerated, but the DFA guidance is clear that the eyes, mouth and cheeks must not look distorted or very different from a plain, neutral expression. A broad, open-mouth smile is treated the same as any other non-neutral expression.
Sleeveless top or clothing that does not contrast with the backdrop
Applicants are advised to avoid sleeveless tops and camisoles and encouraged to wear collared tops, blouses or higher necklines, in colours that clearly contrast with the light blue backdrop. This is the dress-code rule people are most often sent home over, and it has nothing to do with the camera.
5-step recovery checklist
Plan for a photo taken at the counter rather than a print — the passport photo is captured on-site both inside the Philippines and at overseas posts.
Take off glasses and earrings before your turn, and skip eyelash extensions, theatrical make-up and colour contact lenses.
Pin hair back so both eyebrows are visible with no bangs, and keep both ears clear unless you are wearing a permitted head covering.
Wear a collared top or a higher neckline in a colour that clearly contrasts with the light blue backdrop — not sleeveless, not a camisole.
Keep a plain, closed-mouth expression — a medium smile with no teeth showing is what the guidance describes.
Frequently asked questions
01Do I need to bring my own photo for a Philippine passport?
No. The DFA photographs each applicant digitally at the appointment itself, and overseas Philippine posts capture the photo on-site in the same way — several publish this plainly, telling applicants there is no need to bring a photo. A printed photo belongs to separate consular transactions rather than to the passport.
02Can I wear glasses in a Philippine passport photo?
No. Official post guidance lists the use of eyeglasses or shades among the reasons a captured photo is rejected, so plan to take them off at the counter. Colour contact lenses that change your natural eye colour are treated the same way. Since the photo is taken on the spot, this is something you can still fix while you are queueing.
03Is the background blue or white for a Philippine passport photo?
The photo is captured on-site, and the DFA's photo-capturing guidelines still describe the passport photo background as light blue — your clothing and any head covering must contrast with it.
Other rejection guides

Show all 33Collapse






Official sources
Verified .
Reshoot in 2 minutes
Upload a fresh portrait — Anfas.Pro applies the correct crop, background and biometric framing automatically and shows the result before you pay.